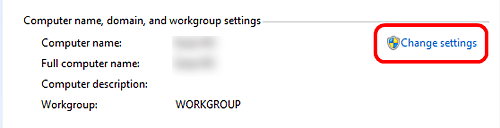
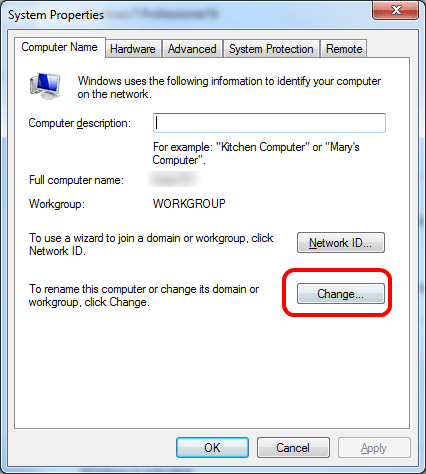
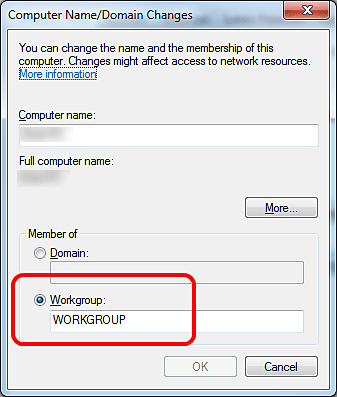
This how-to article details the process to change the Workgroup in Windows 7 which allows for sharing of files and system resources over the network.NOTE: Windows 7 is no longer supported by Microsoft or Micro Center as the operating system has reached its end of life, this guide is available for those still looking for assistance with Windows 7. Further troubleshooting outside of this guide for Windows 7 is not available from Micro Center.Here is how to change workgroups:1. Click on the Start button in the bottom left, then right click on Computer and then click on Properties from the list of options. 2. On the new Properties window, look for the section labeled Computer name, domain, and workgroup settings and click on the Change Settings button to the right. 3, If prompted by User Account Control, click on Yes or OK, and then on the new window click Change. 4. In the Workgroup box, erase the name of the Workgroup (Shown below as WORKGROUP) and enter the workgroup name to join. 5. Click OK and if prompted, restart the computer to complete the change.